How to Colorize Black and White Photos
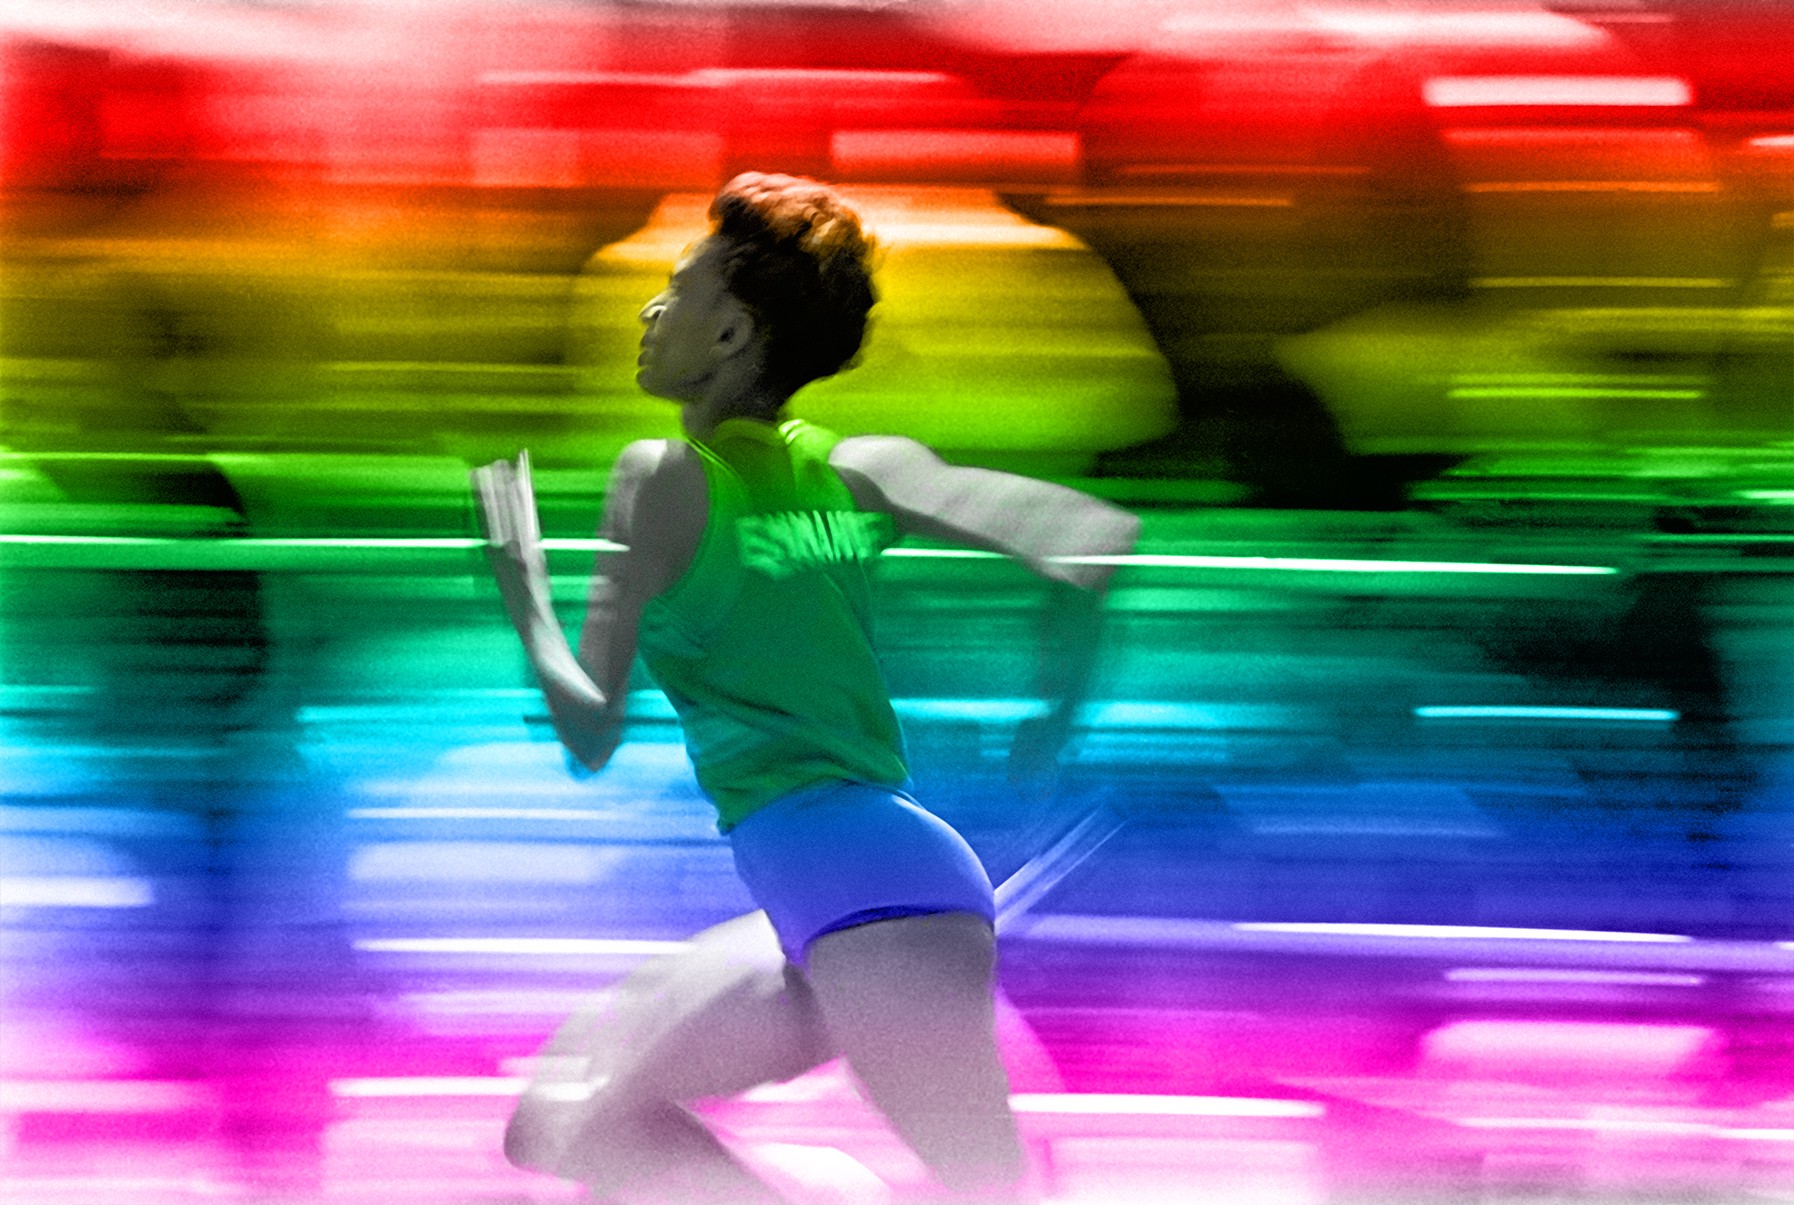
This article describes how to colorize black and white photos with Photoshop. The photo below is one I shot many years ago with a Canon F-1 35mm film camera.
I was covering a track and field event in the early 1980s. For the shot, I used a slow shutter speed and panned the subject horizontally to amplify the movement and blur the background.
Table of Contents
- Do This First: Make a Working Copy
- Make a Layer Copy
- Change the Color Mode
- Adding Color
- Placing the Gradient
- Color Blending Mode
- The Layer Mask
- Preparing to Paint
- Zoom Factor
- Brush Size
- Black Subtracts – White Adds Color
- Opacity Factor
- The Final Result
- Summary of the Key Steps
- Working with Photoshop
- Video Version of the Tutorial
- Final Questions
Equipment and Tools Used for this Tutorial:
- Camera: Canon F-1
- Lens: Tokina 35–105mm
- Film: Kodak Tri-X black and white 35mm film
- Software: Photoshop
- Input Device for Editing: Wacom Intuos Creative Pen Tablet

The focus of this article is how to colorize old black and white photos. If I intended to restore the image and colorize it as a true-life photo, I would have painted it. That’s not my intent with this image.
I’m colorizing it for artistic value. One area I enjoy with photo editing is selective color, where a portion of a gray scale image has a hint of color. This project is the inverse of that with a colorized image, leaving selective gray scale portions.
Do This First: Make a Working Copy
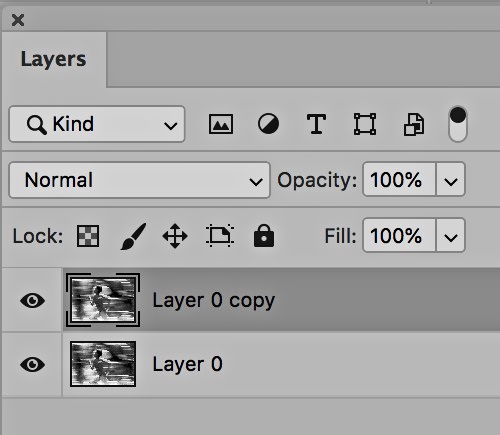
In Photoshop, before you change your image. Make a copy and ensure you do ALL your edits to the copy.
This way, if you make another version or, like in my case, revisit this image almost 40-years later, you’ll have a good original to start with.
I know this sounds like a basic tip, but it’s one you don’t want to miss.
Make a Layer Copy
In the upper Photoshop menu, select LAYER, then DUPLICATE LAYER.
Or use a shortcut: Command +J on a Mac / Control +J on a PC.
Change the Color Mode
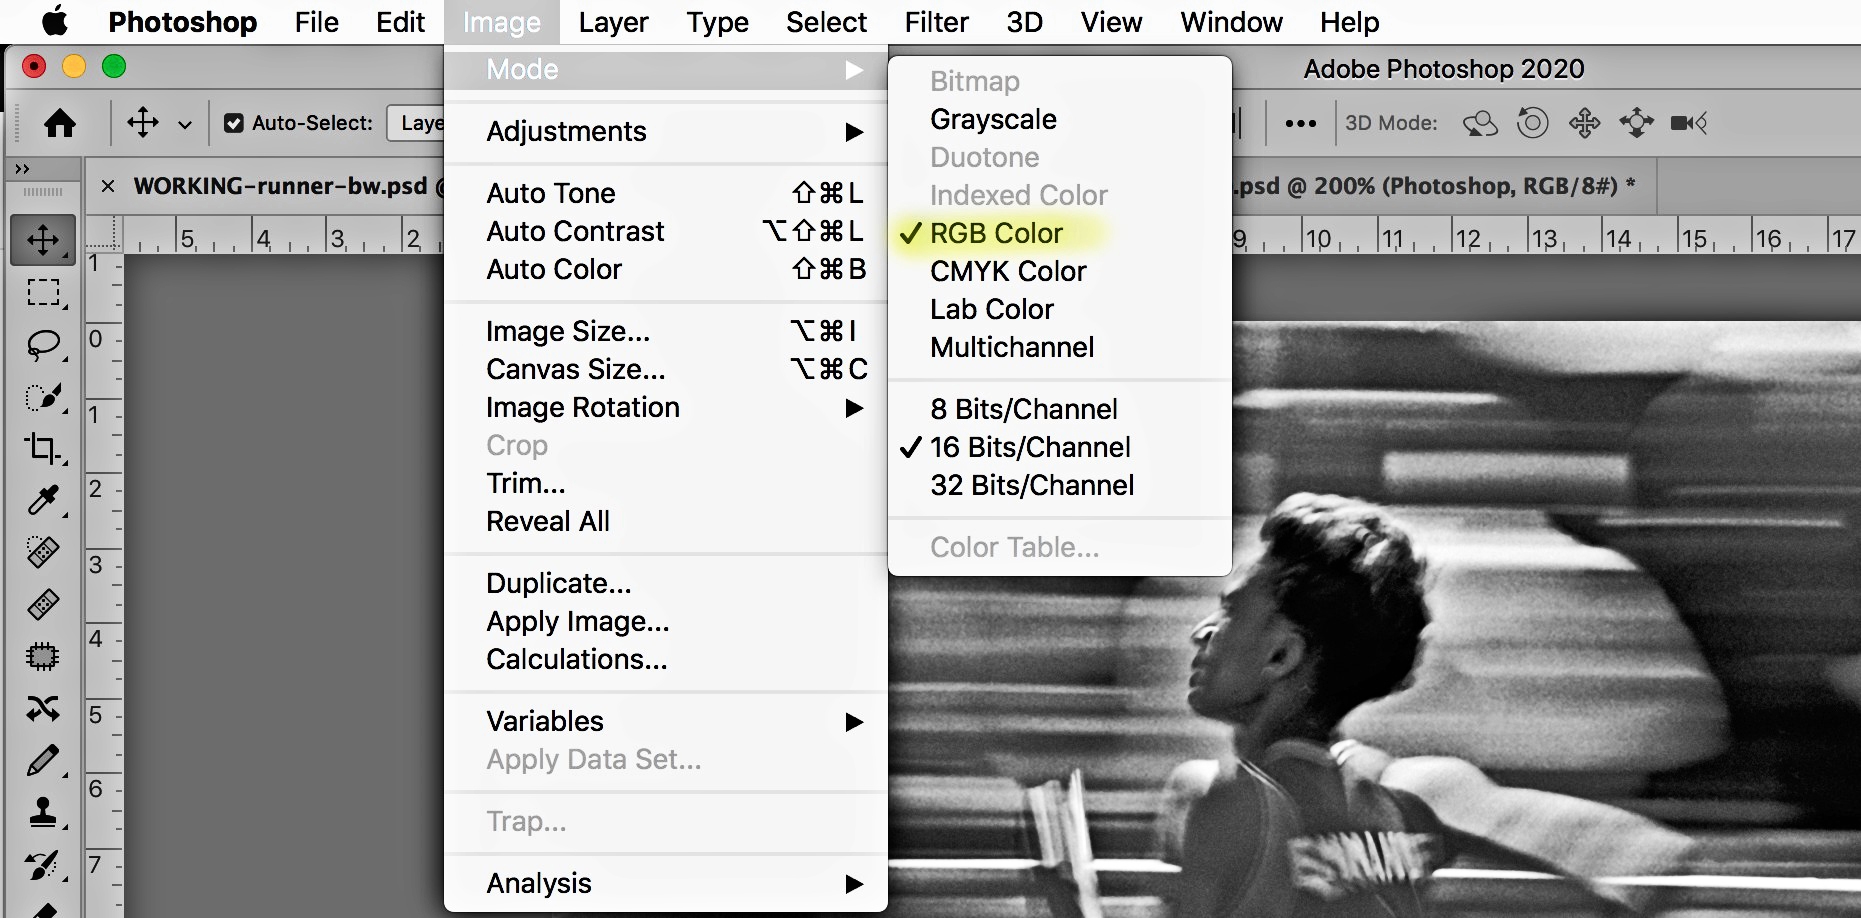
Since the photo is a black-and-white image, it’s defined as a “Gray scale” image. That means that if you want to colorize it, you must change the color mode to RGB as shown below.
This is important when you colorize black and white photos. Otherwise, no colorization steps moving forward will work.
Adding Color
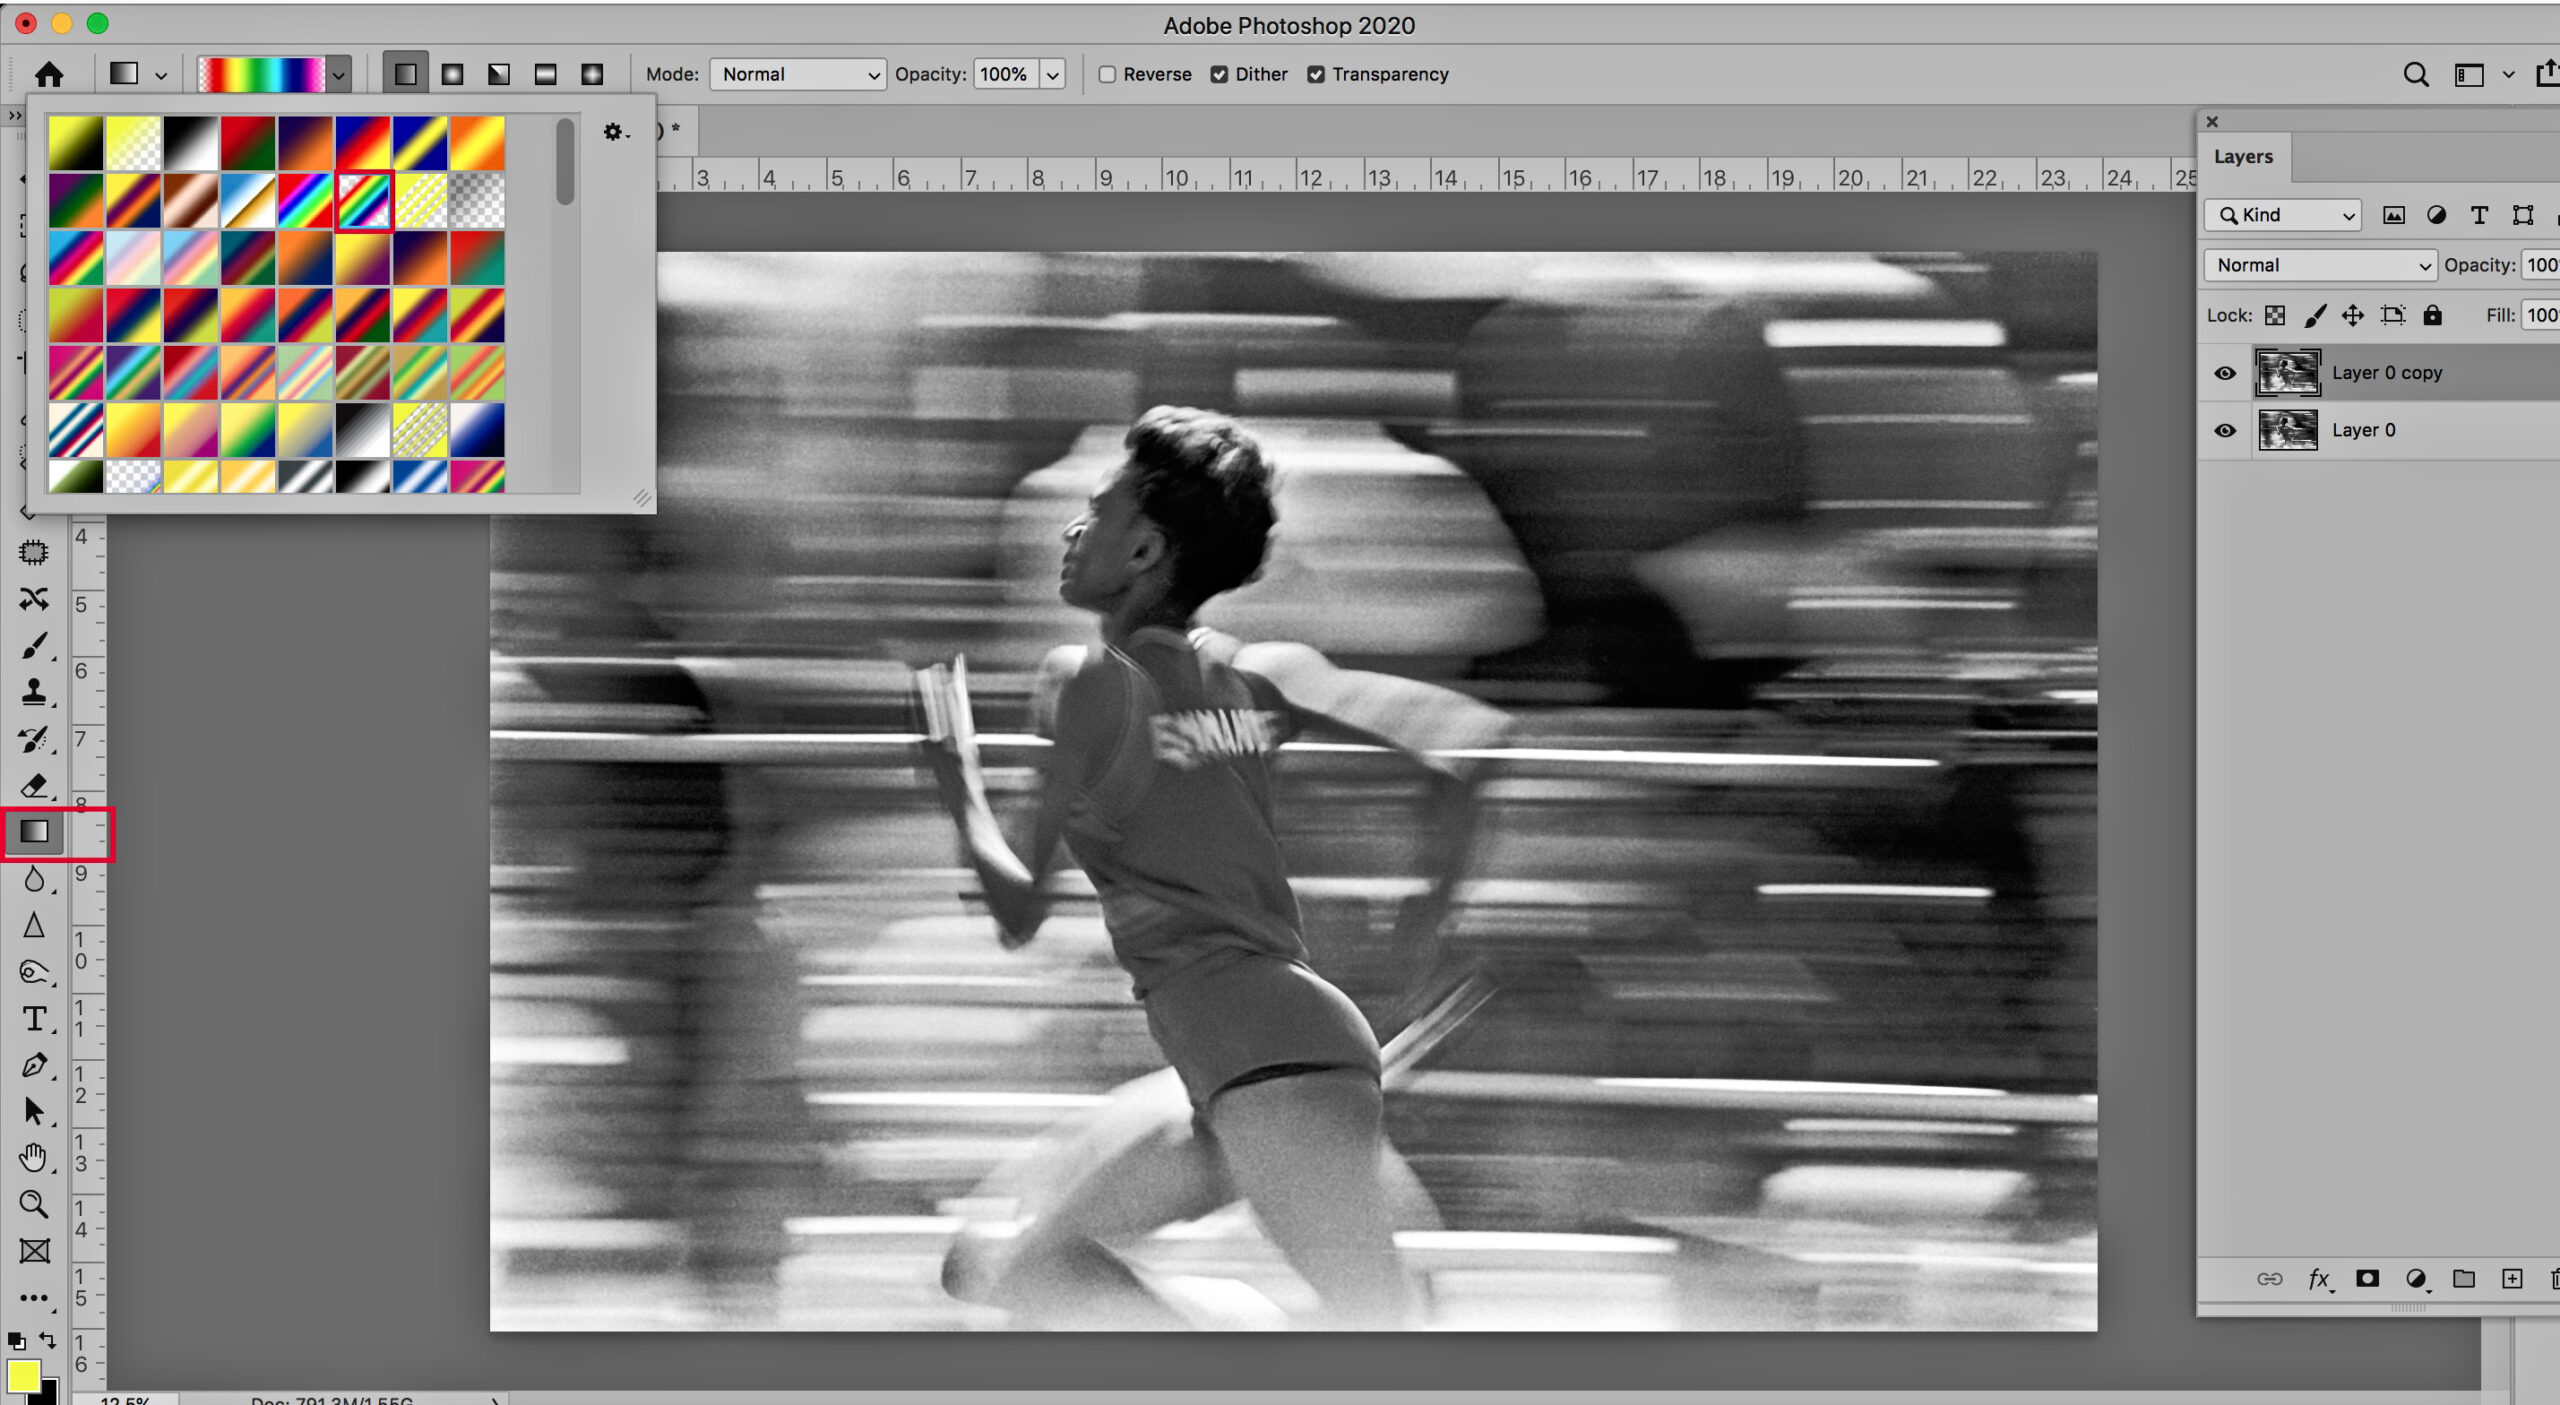
Be sure to work on your “Layer Copy” as shown in the screenshot above in the “Do This First” section. (Listed as “Layer 0 copy” in this example).
- Select the Gradient tool as shown in the left-hand tool bar.
- Then choose a gradient pattern. For this example, I chose the “Transparent Rainbow” (sixth pattern of the second row).
You could pick any pattern you want for your image. I chose this one because it has more colors.
Placing the Gradient
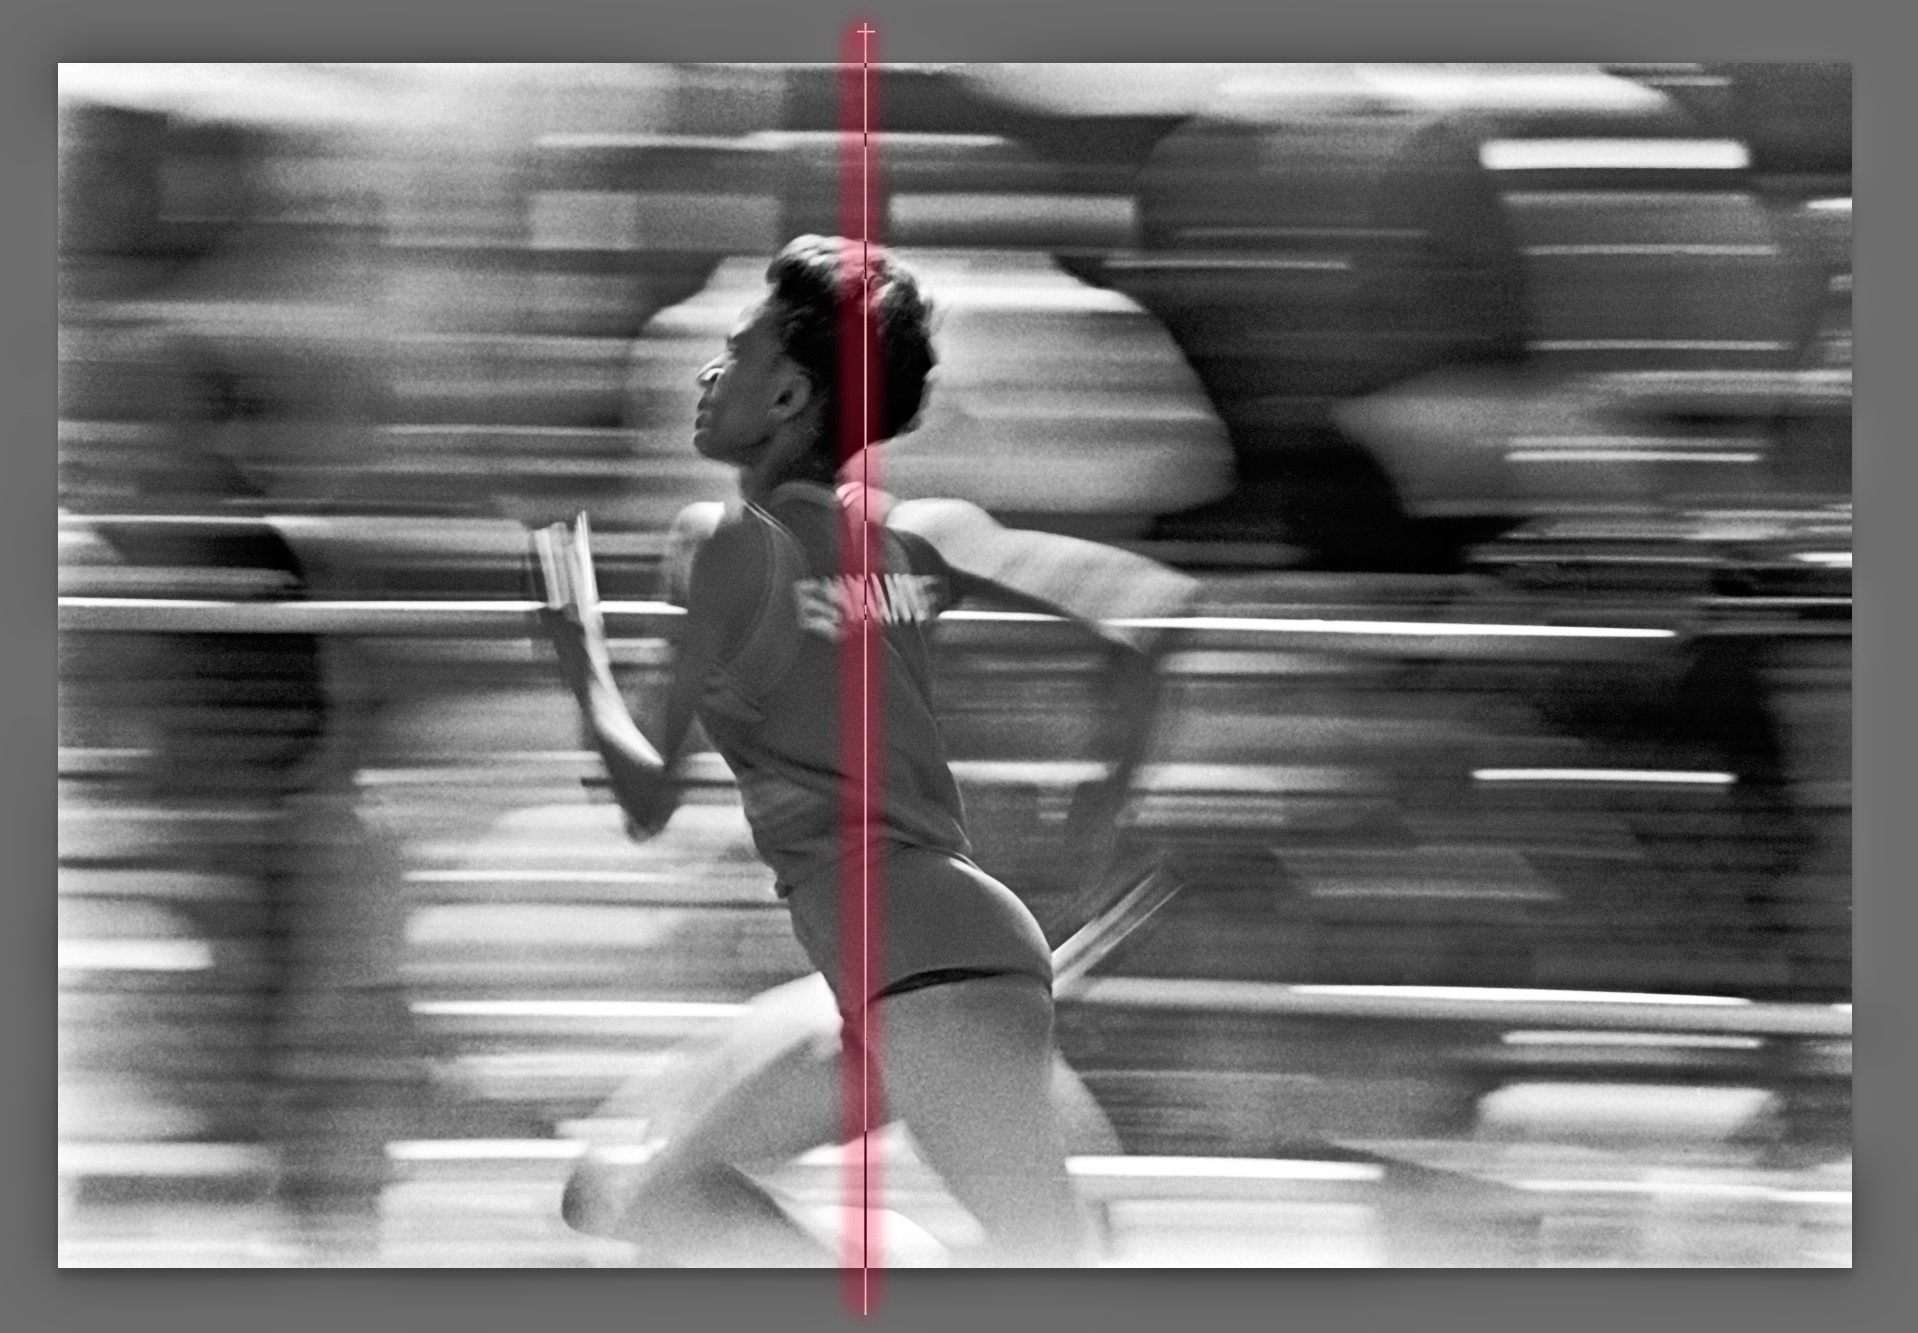
- When placing the gradient over the image, you can select any angle. Because this image has horizontal lines from panning the image, I want the various colors to display horizontally.
- Place your cursor near the top of the image and left-click with a mouse or click with a pen tablet, depending on your tool of choice.
- Then drag down vertically to the bottom of the image and release. This will lay the gradient on top of the image.
Color Blending Mode
The photo is under the gradient. The next step is to go over to the Layer Menu on the right.
At the top you’ll see the word “Layers”, then Kind… then, right below that is the blending mode. It should say “Normal”. Click the Normal drop-down and scroll down to “Color”.
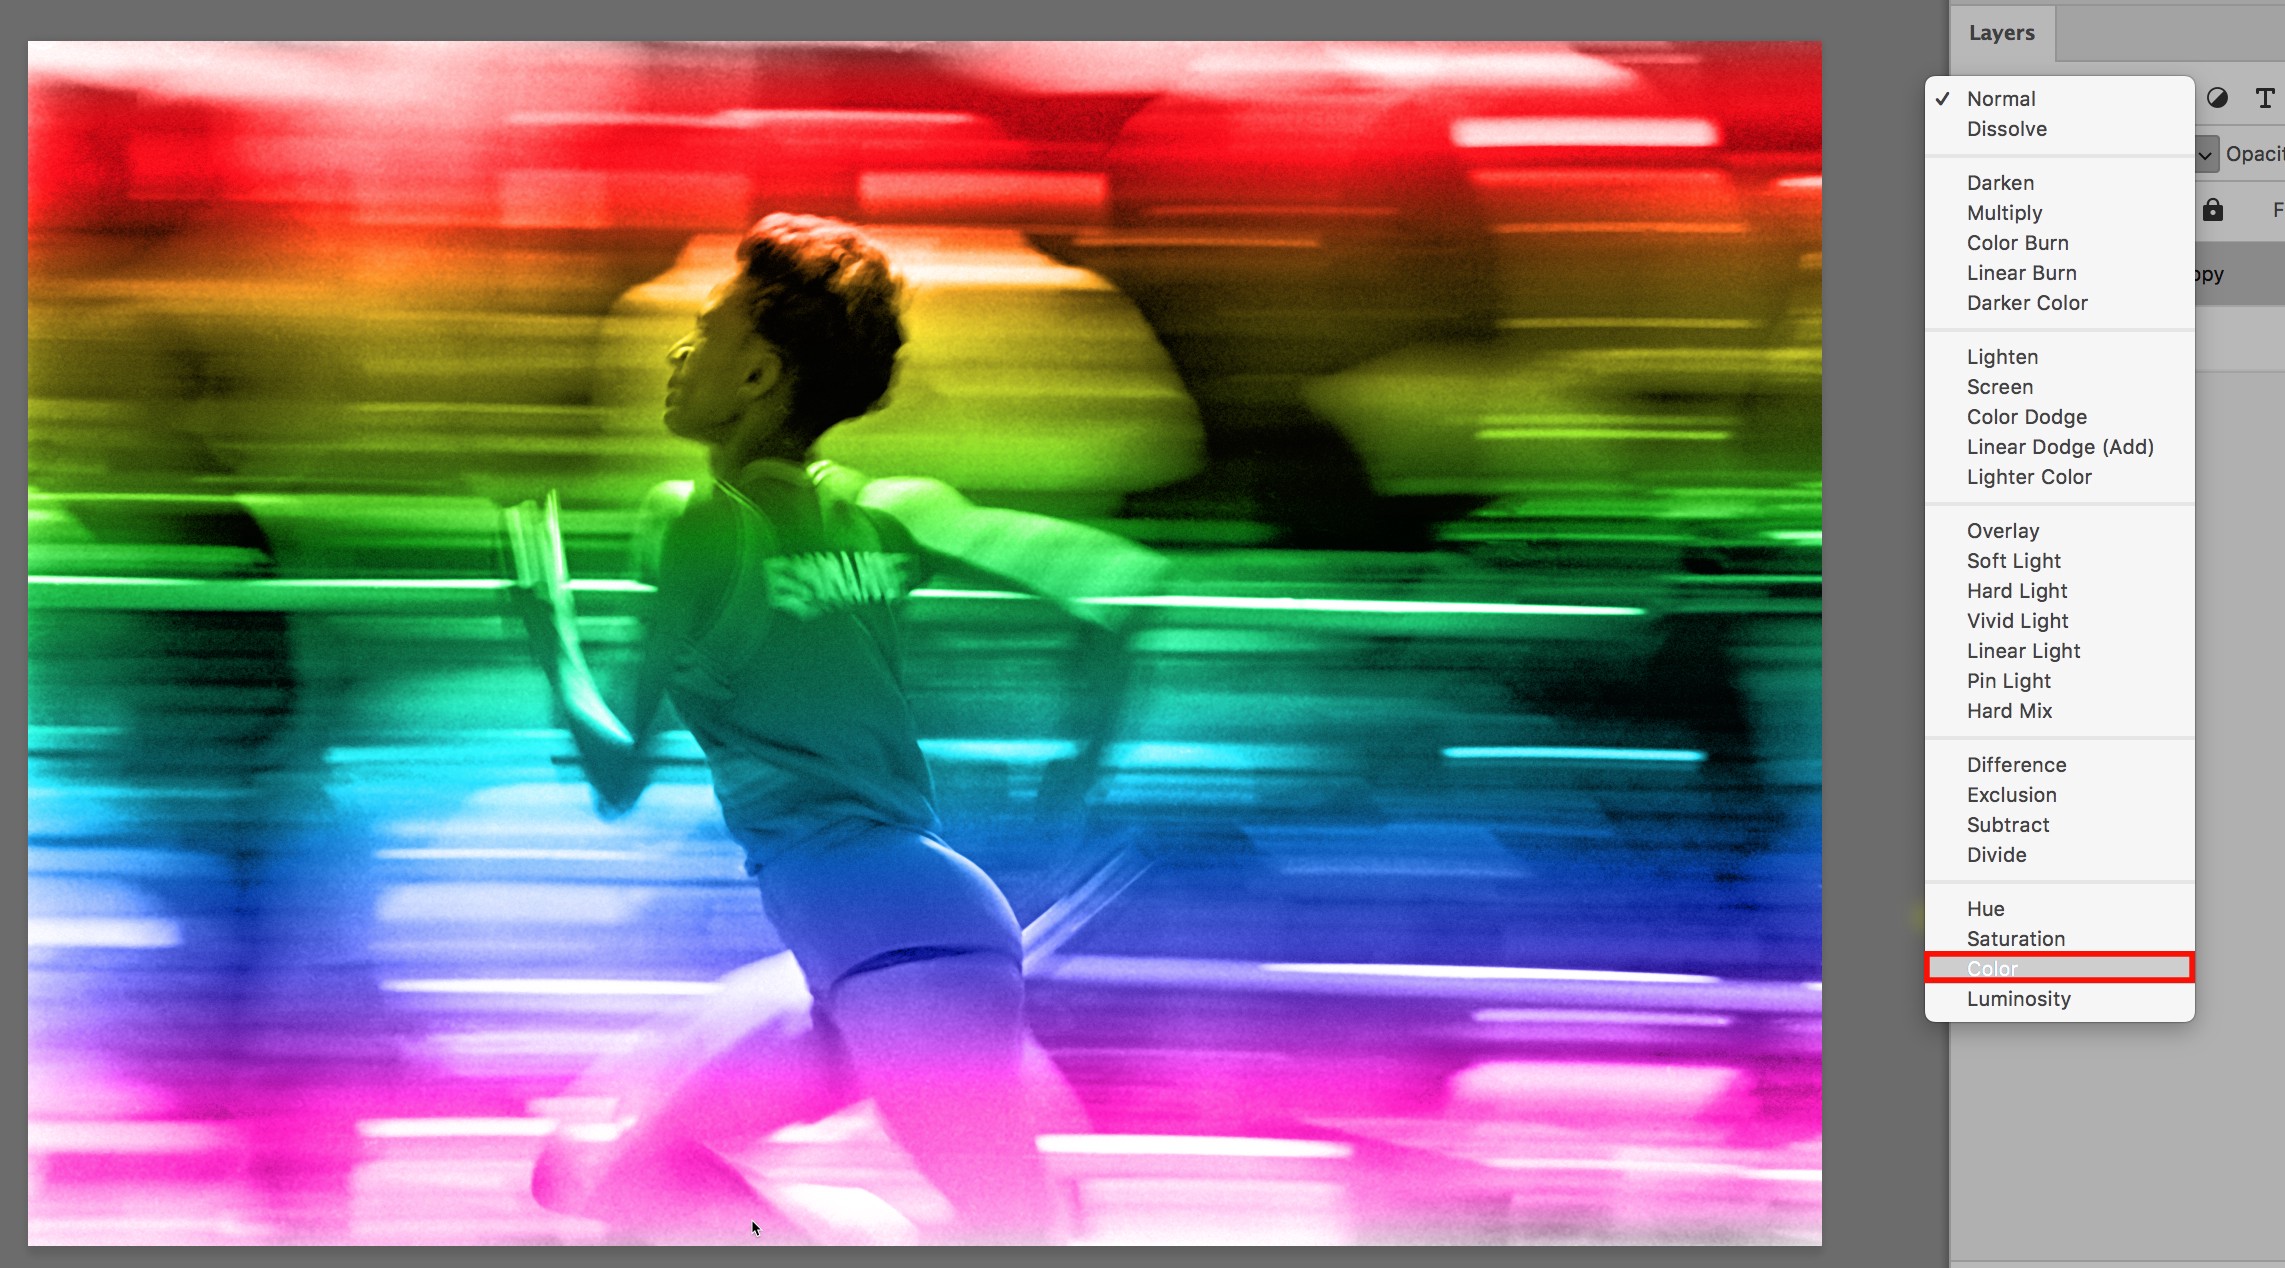
I suppose I could have stopped right here and called it done, but I really don’t want the runner to have green arms and purple/pink legs. This is where the next step, a layer mask comes in.
The Layer Mask
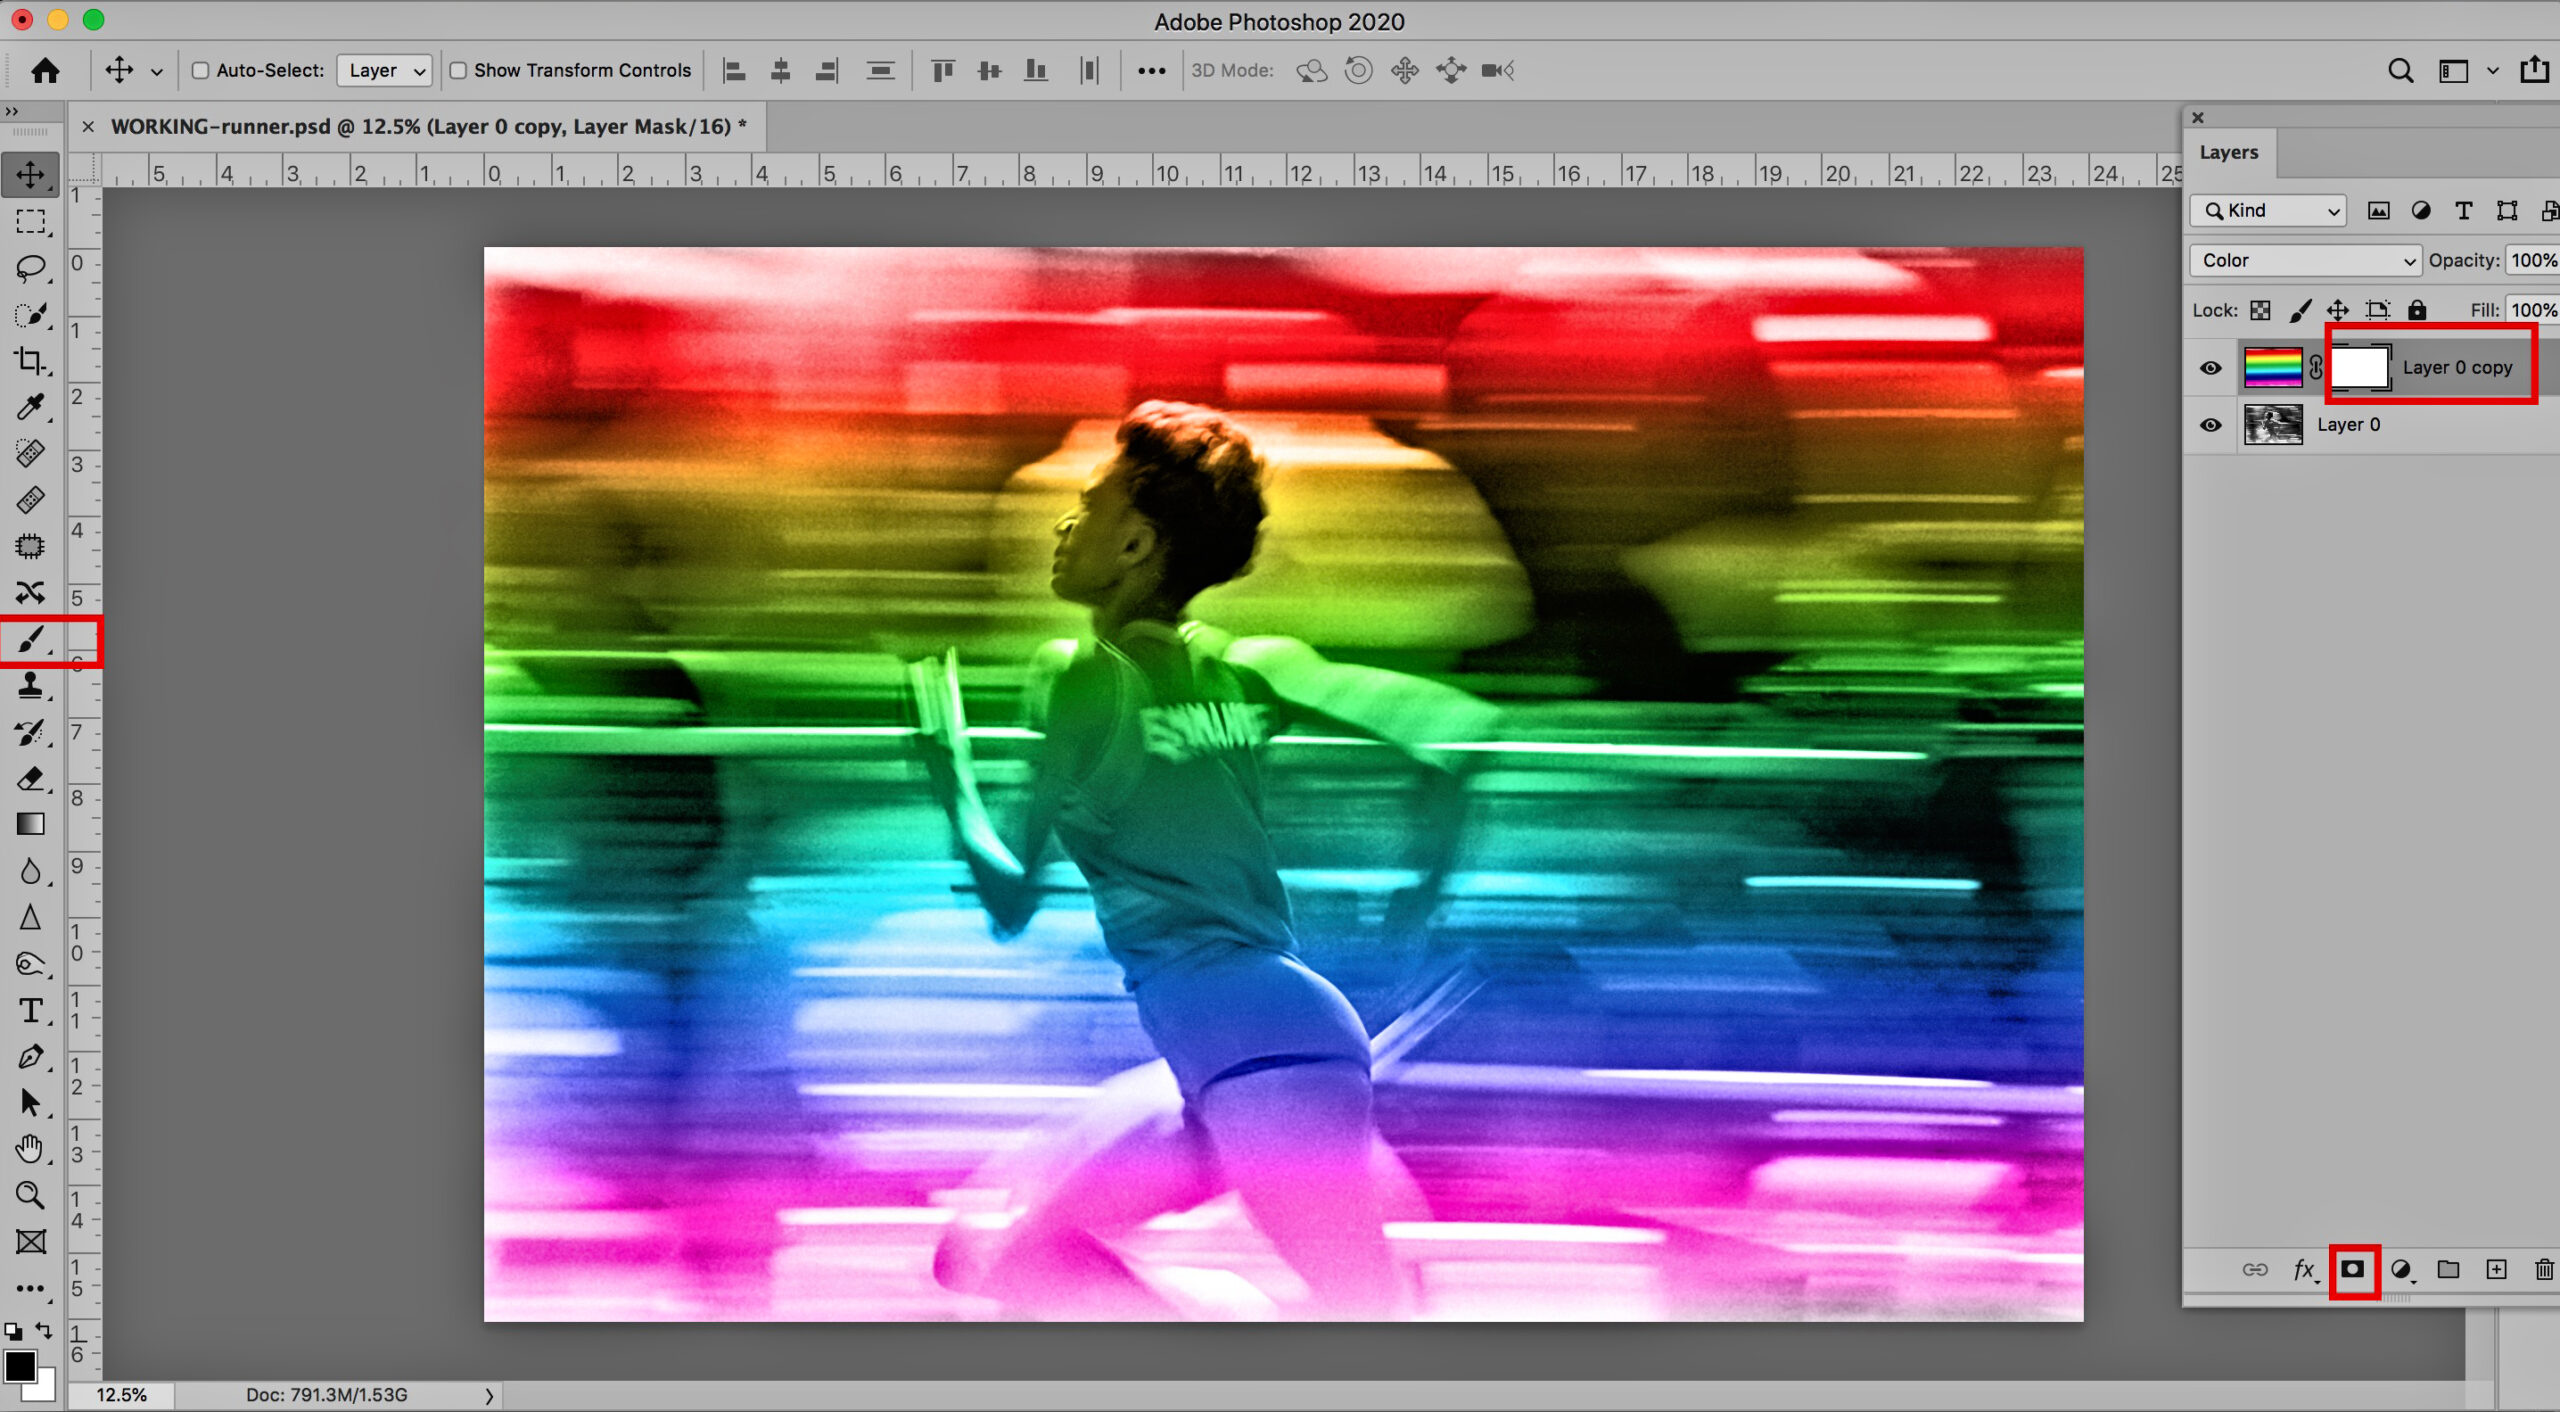
At the bottom of the Layer menu, there is a black box with a hole in it. That is the “Layer Mask”.
- Click that and you will see a white box show up next to the gradient image at the top. Click inside that white box. That selects the working layer mask — not the gradient image.
- On the left-hand side, select the Brush tool, or type the B key (for the brush).
- At the bottom left are two colored boxes. Be sure the top box is black, and the bottom one is white. This is the “Default” setup.
To ensure you have the default set, you can type the D key and it should set it to black and white.
During this stage, you will be “Painting” color away from the runner.
Preparing to Paint
When zoomed in, the image shows the silver-halide particles (or grain) from the 35mm film.
Zoom Factor
Zoom in the image so you can paint easily. Command + (zoom in) or Command — (zoom out on a Mac) / Control + and Control — for a PC.
Brush Size
Adjust your brush size to keep control of the area you want to paint. To make the brush smaller, press the left-hand bracket “[“, or right-hand bracket to make the brush larger “]”.
Black Subtracts – White Adds Color
With the layer mask set on black, you are painting the overlaid gradient away. Remember, If you go too far, switch to white and you can paint it back in place.
It’s just a matter of painting away the parts where you want the gradient removed. If it totally gets hosed up, that’s okay… you are working with a copy layer. Your original is still intact.
Opacity Factor
The next thing to consider is the “Amount” of gradient you are removing. You could paint with 100% opacity. I’ve found that it most often takes too much away.
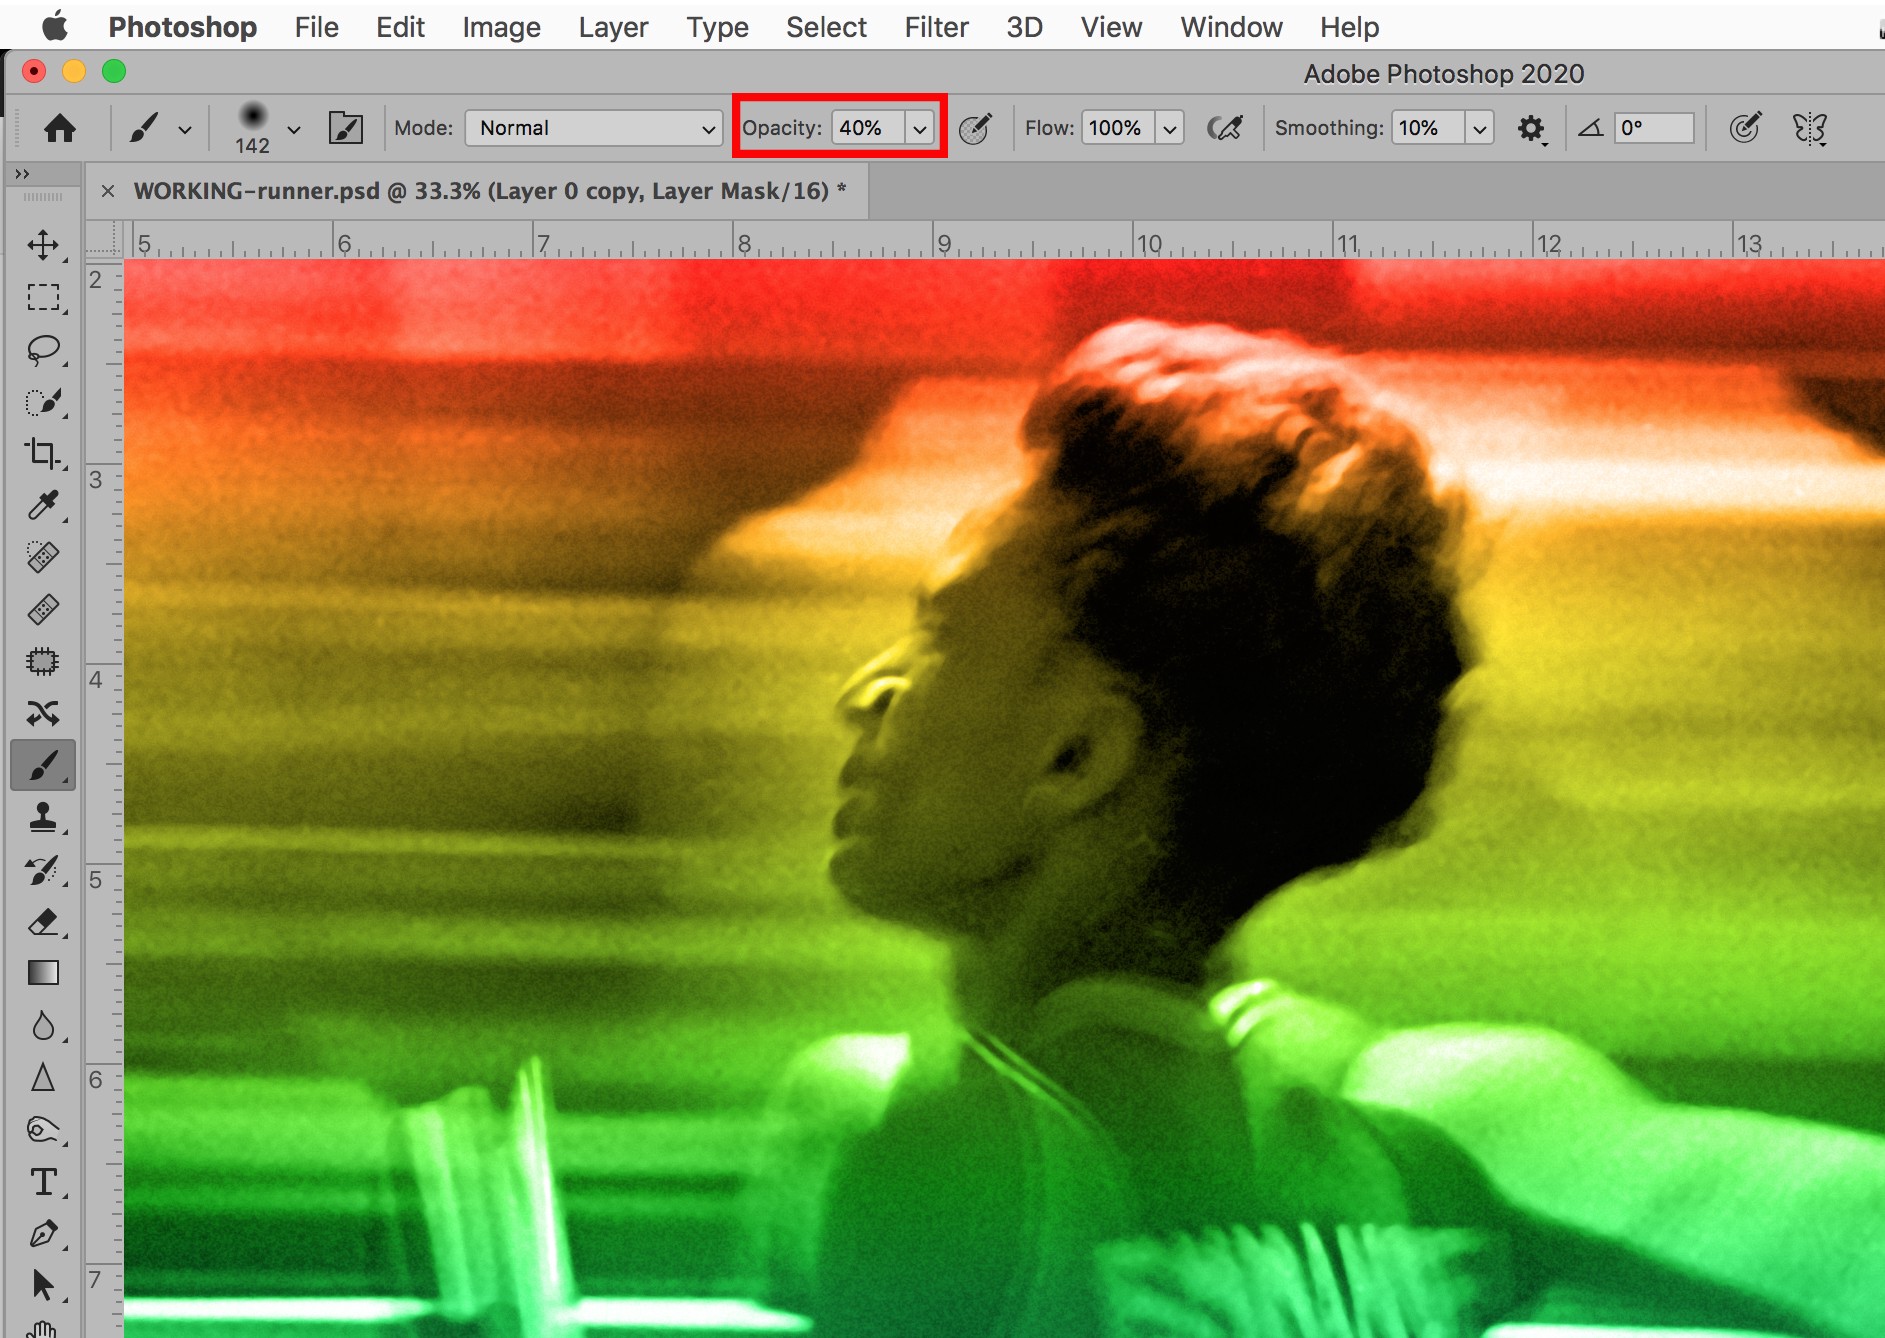
It’s best to remove a little at a time and a mix of the gradient and background image looks more realistic. For this image, I’ll start with 40% opacity (meaning you are leaving 60% behind).
To adjust opacity, refer to the image below. For 40%, you can type the number 4 (5 for 50%, 6 for 60%, and so forth up to 0 for 100%).
Note: One thing about opacity is that each painting pass will increase by the amount of the opacity selected. What that means is, in this case, I’m painting at 40% opacity.
When I lift the brush off and return, it will show another 40% removal, equaling 80%, up to 100%. (Three passes won’t give you 120%). Most of my image has 100% gradient removed, it’s still my preference to paint it away a little at a time. Each person has their own approach.
The Final Result
Here’s the final result. This is a simple process that you can use to colorize black and white photos. Take a look through your photo collection and see what old black and white images you can bring to life.
There are lots of creative choices you can make. The original photo doesn’t have to be a black and white. It could be a sepia tone, or even another color image that you overlay onto a different background.
For something like that, you might consider a composite. We’ll be doing composites in an upcoming post.
Summary of the Key Steps
Through this simple step-by-step tutorial, you learned how to:
- Make a Layer Copy to protect your original image.
- Change the Color Mode.
- Add Color.
- Work with Gradients, and Color Blending.
- Apply a Layer Mask and paint away color.
- Resizing the image view, brush size for editing, and opacity levels.
Working with Photoshop
There are lots of resources available to gain familiarity and expertise with Photoshop. The key is to “Just Do it”. The best experience comes with finding your way around the tool and the many ways to create incredible images.
When I first bought Photoshop years ago, it came in the mail on CDs with a $600 price tag. Within a year after buying it, they upgraded and my version was out of date. Today, Adobe offers the Creative Cloud.
I’ve been taking advantage of this offer for years. So far, in all those years, the price has never gone up. It also comes with Lightroom, which allows fast photo editing and meta-tagging of your images so you can find them.
As a 40-year pro-photographer, I’ve got over 170,000 images. With Lightroom, when a buyer contacts me for images, I don’t spend time searching; it’s easy to find.
Video Version of the Tutorial
View the video at: https://youtu.be/itd82Y122jU
Final Questions
Has this tutorial been useful to you? If so, How? Please leave a comment below and let us know how this can add to your creative approach to photography?
Do you have any further questions? Send me a note at the Contact Link.
Disclaimer: In all honesty, I have to say there are links I’ve provided that are affiliate links. I have partnered with those tools and organizations that I actually use and believe in. When a person makes a purchase, I earn a small commission at no cost to you.
I often spend hours working to create useful resources for you. It’s my goal to create an updated information resource. The small amount of affiliate payments I receive help to fund this project.


Comments (0)